Myth of Empires V1.0 Dedicated Servers Setup Guide
Single Custom Server Guide:
To create a custom server, go to the game's main menu, select "Custom Server," switch to the "Single Server" tab, and click on "Create Server" to open the server tool. Alternatively, you can right-click on "Myth of Empires" in your Steam game list, select "Manage," and then choose "Browse Local Files." Open the "PrivateServerTool" folder and run "PrivateServerTool.exe."
Server Basic Settings:

In the left tab, select "Server Basic Settings." Pay attention to the following configurations:
Server Name: The name displayed in the game under the custom server - single server list.
Server Password: If set, players need to enter the password to join.
Server ID: If multiple servers are launched on a physical host, each server must have a unique ID. If only one server is being opened, it can be left as the default. Server archives are saved based on the server ID, and changing the server ID will result in the loss of archives.
Game Port/Query Port/Remote Management Port: Each server on a physical host needs different ports. Ensure they are within the range 1024-65535 and not in use.
Enable Remote Management: Default is enabled; allows remote management using tools like RCON. Configure the IP and port.
GM Accounts: Automatically retrieves Steam IDs of logged-in Steam accounts; use semicolons to add multiple GMs.
Start Server in P2P Mode: Enables network traversal via Steam for players outside the LAN when lacking a public IP. Note: this feature is unstable in complex intranet environments.
Parameter Settings:
Adjust game parameters according to preference from Advanced Settings to Guild Settings.
Mod Management:

Automatically detects installed mods; input Steam Workshop Mod IDs and click "Install" to add mods.
In SteamModList, click the leftmost square (□) of the desired mod to enable (turns into a checkmark, √).
Launch Console:

In the Launch Console tab, choose the map and click "Save Configuration" to complete server setup.
To quickly generate another server configuration with similar settings, modify the server list ID and click "Clone Server." Adjust server basic settings like name, ID, and ports.
Start Server:
ServerId:100, ServerState:EGameServerState::SERVER_STATE_OPENED
In the Launch Console tab, click "Start Server." A window will appear; double-click "Start Private Server.bat" to launch the server. When the following information appears in the server info, the server has started:
ServerId:100, ServerState:EGameServerState::SERVER_STATE_OPENED
Possible Issues:
If the server fails to start, repeatedly showing an error in red text, check for port conflicts, and verify local memory and network conditions.
If the server starts successfully but others cannot join, confirm if your machine has a public IP or perform port mapping.
Cluster Servers Guide
At the game's main menu, choose "Custom Server," switch to the "World" tab, and click "Create Server" to open the server tool. Alternatively, in the Steam game list, right-click on "Myth of Empires" select "Manage," and then choose "Browse Local Files." Open the "MatrixServerTool" folder and run "MatrixServerTool.exe."
For non-professional users, most configurations can be left at their default settings. Only a few operations, such as adding and saving, are required.
Scene Server Configuration:
Switch to the "Scene Server" tab on the left after opening the tool.
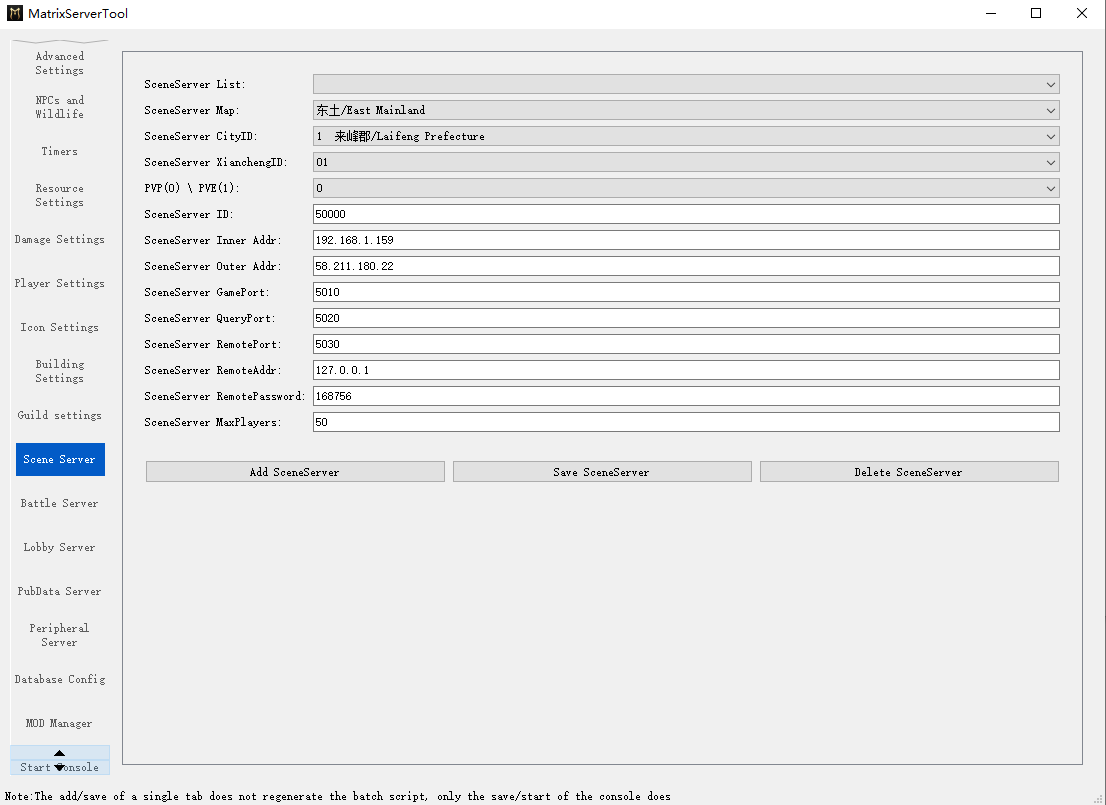
In a custom server of the World type, you can open multiple scene servers, each representing a county in the official servers.
Scene Server Map: Choose between the two official maps, Middle Earth and East Earth. The tool may add support for selecting MOD maps in the future.
Scene Server ID: Each server needs a unique ID, and the archives are saved based on the server ID. Changing the ID will result in the loss of archives.
Scene Server Internal IP: The LAN IP of the physical host, used for communication between different servers. The tool will automatically retrieve this information.
Scene Server External IP: The public IP of the physical host, used for client login. Note that the obtained public IP may not always connect to your server, and additional port mapping may be required.
If there's no public IP, you can use the LAN IP, limiting access to only local players. Alternatively, enable the "Start Server in P2P Mode" in the upper-left tab of the tool, allowing non-local players to enter without a public IP. However, this feature is unstable and may fail in complex intranet environments.
Game Ports, Query Ports, and Shutdown Ports: Used for accessing server-related functions. Each service on a physical host needs a different port, and the tool will automatically check for port availability.
After configuring the above, click "Add Scene Server" to create a scene server. Then, modify server ID, county ID, ports, etc., to add another scene server.
Battle Server Configuration:
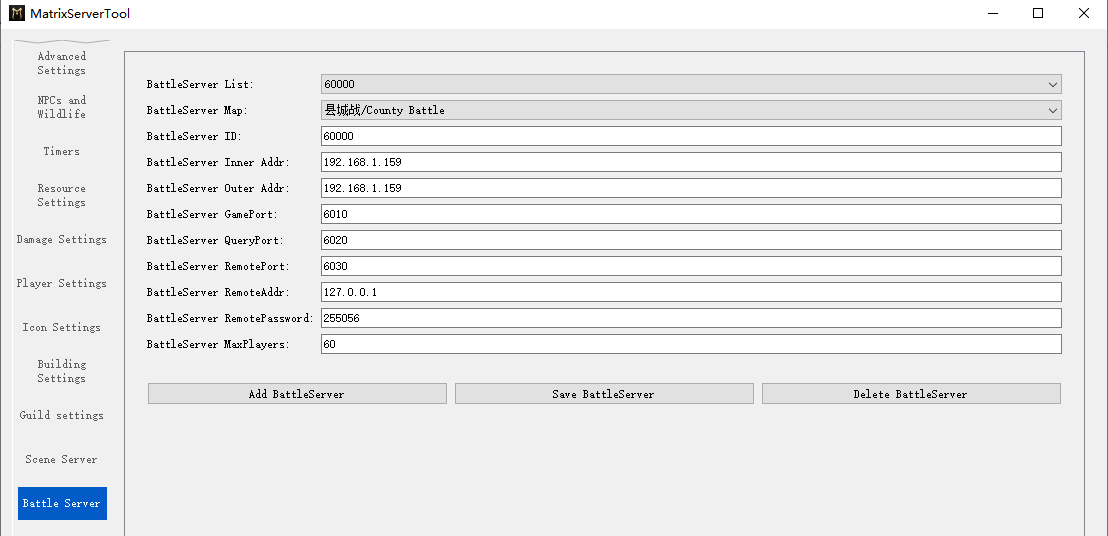
A custom server can also open multiple battle servers. Players can enter the battlefield only after the set start time.
Battle Server Map: To initiate a battlefield, only one of the following needs to be opened: County Battle, Prefecture Battle, or Fortress Battle. For Fair Battlefield - Jousting, one of the specific rules, such as Horse Station Battle, County Battle (Jousting), Prefecture Battle (Jousting), or Fortress Battle (Jousting), can be opened. Multiple Fair Battles can be initiated simultaneously.
Battle Server ID: Each server needs a unique ID.
IP/Port: Refer to the scene server's relevant instructions.
Lobby Server Configuration:
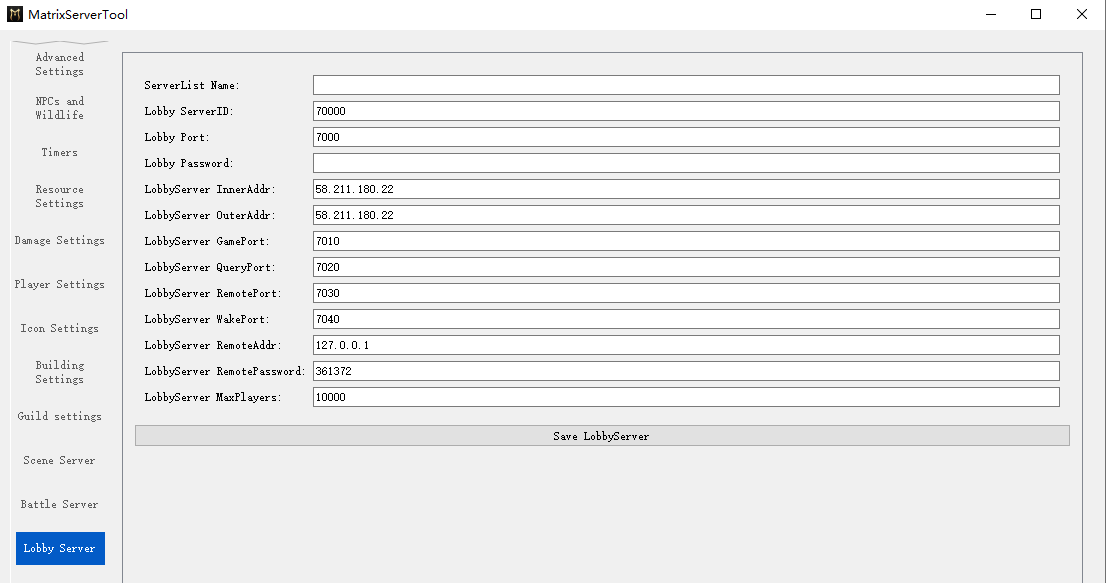
Only one lobby server is needed for player connections, character creation, AFK, county selection, etc.
Server List Name: Displayed in the client's custom server - world interface server list.
Lobby Server ID: Each server needs a unique ID.
Lobby Server Password: If set, players need to enter a password when entering your server.
IP/Port: Refer to the scene server's relevant instructions.
Lobby Server Player Limit: As one lobby server serves multiple scene servers, the player limit needs to be higher than that of a single scene server. Default settings are recommended.
Public Server Configuration:
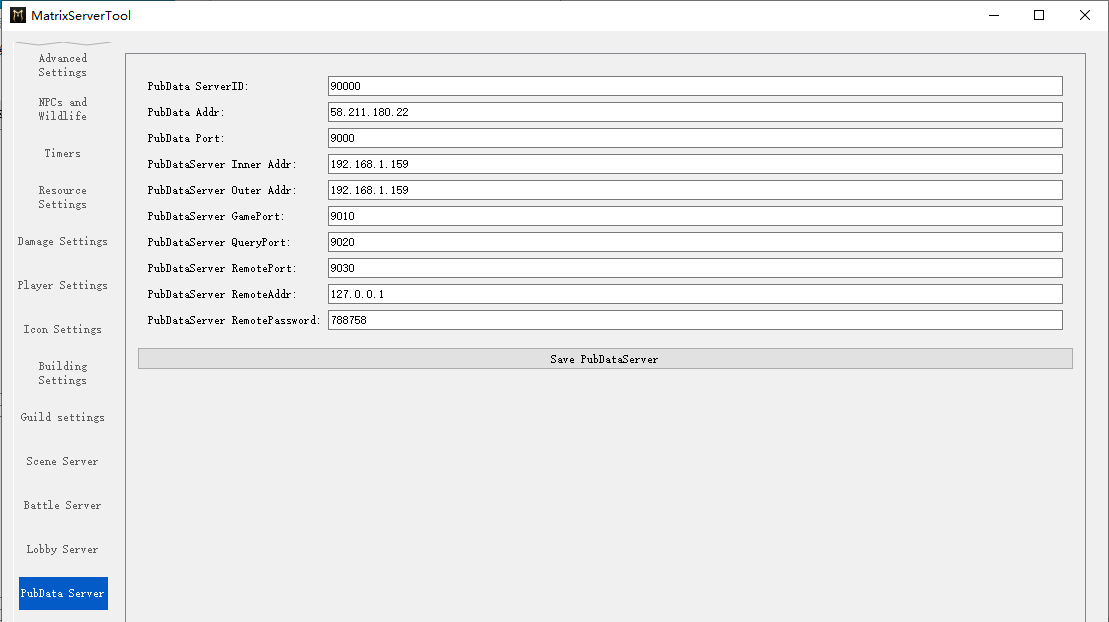
Server ID, IP, and ports follow the scene server's relevant instructions.
Peripheral Server Configuration:
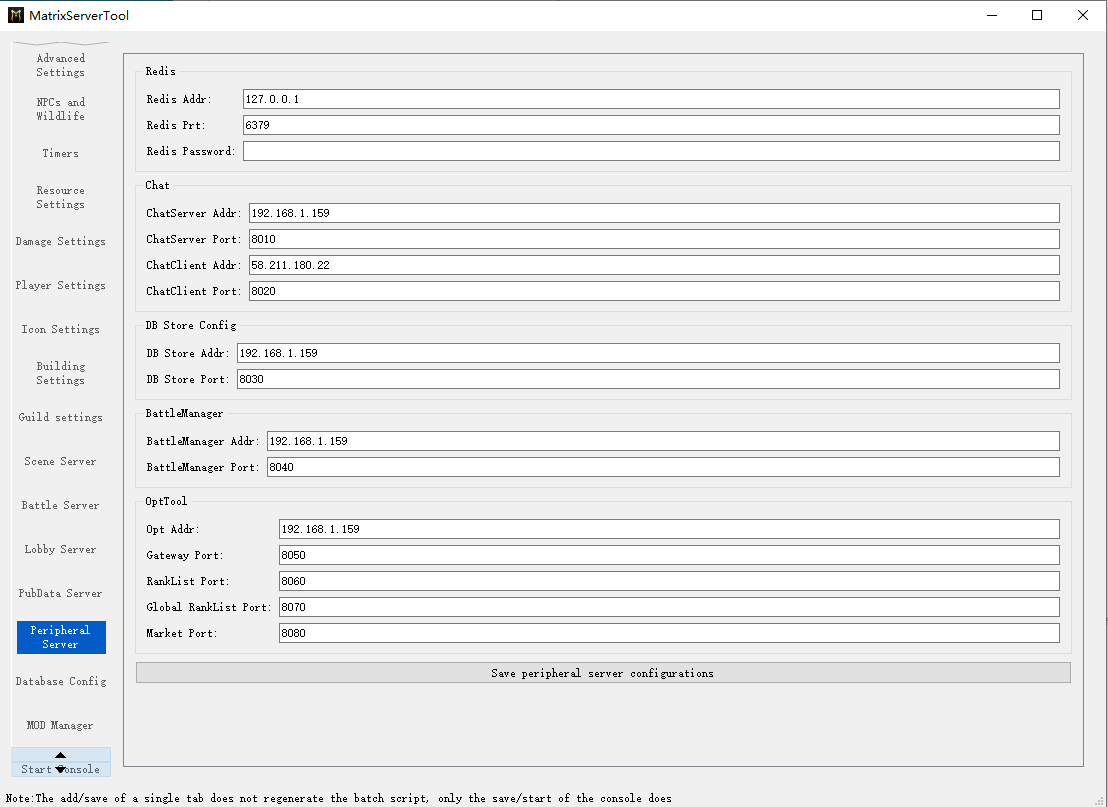
Note that Redis configuration is required for peripheral servers. Install Redis software, and the tool's default IP and port match the default settings during Redis installation (no password).
All IPs in the peripheral server are internal IPs, and ports should be different from those of other services.
Database Configuration:
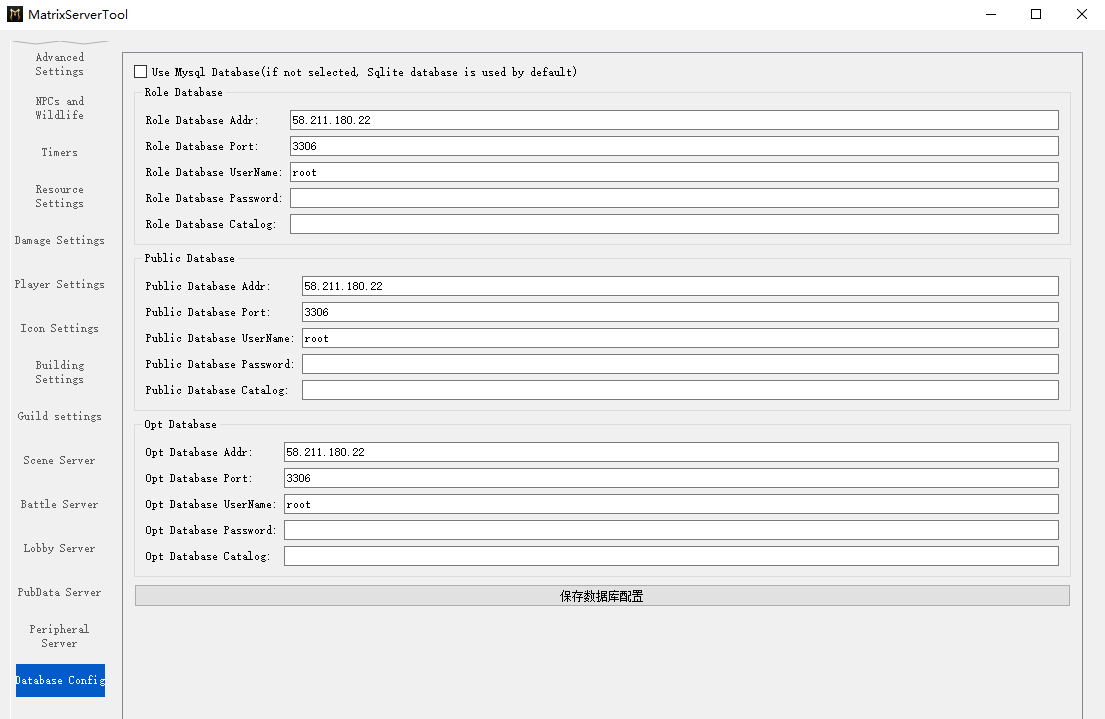
For non-professional users with a moderate number of players, it's recommended not to use the MySQL database. No changes are needed on this tab. The default is to use the SQLite database, which requires no software installation or additional configuration.
Parameter Settings:
From the left tabs, Advanced Settings to Guild Settings are various in-game function parameter settings. Default settings match official servers, and you can adjust parameters based on personal preferences.
Mod Management:
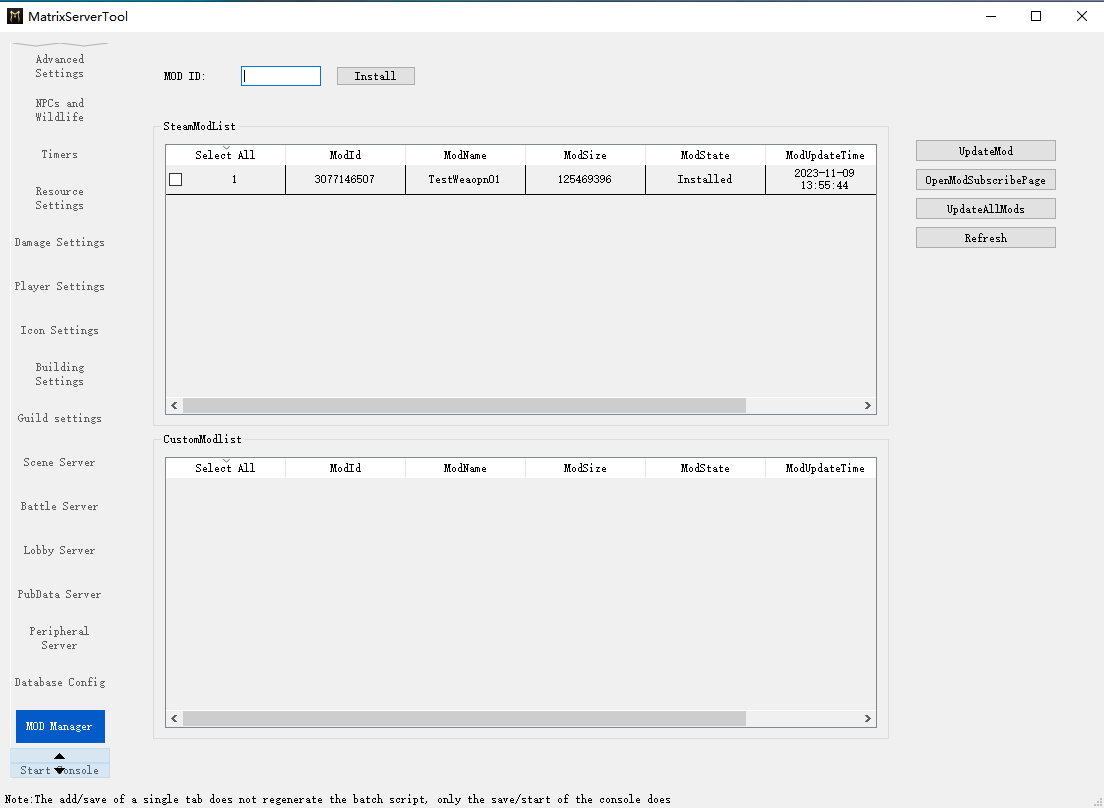

The tool automatically detects installed mods; you can input Steam Workshop Mod IDs in the top input box and click "Install" to add mods.
In the SteamModList, click the leftmost square (□) of the desired mod to enable it (turns into a checkmark, √).
Start Server:
After completing the configurations, go to the bottom of the left tabs, select "Launch Console," click "Save Configuration," and start the server. The tool will start all server processes at once.
When the Lobby Server shows "LogStoreServer: [2] Log: register succeed," the lobby server is launched. At this point, your server should be searchable in the server list, and players can enter to create characters.
The Scene Server's startup is relatively slow, so after creating a character and selecting a county, the map may initially appear empty. Wait for some time.
When the Scene Server displays the following information, it means it has started:
ServerId=50000, ServerState=EGameServerState::SERVER_STATE_OPENED
Possible Issues:
If the game_chat_service repeatedly shows "remove visitor groups' members failed, will retry in 2 seconds," the issue may be incorrect Redis configuration. Use the default Redis configuration in the tool if you haven't modified the IP, port, or password after installation.
If the server fails to start, repeatedly displaying an error in red text, check for port conflicts, or examine local memory and network conditions.
If the server starts successfully but other players cannot join, confirm whether your machine has a public IP or perform port mapping operations.